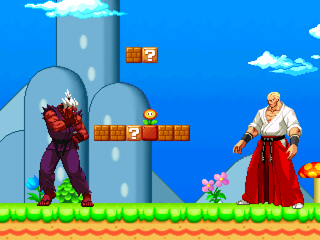
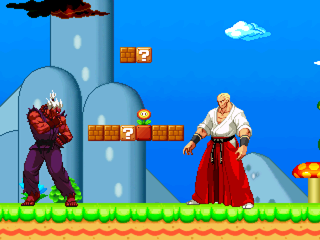
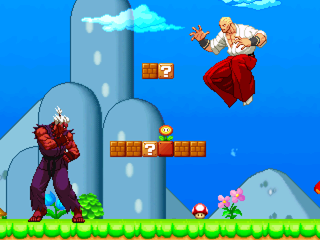
Newagemugen
Newagemugen
Would you like to react to this message? Create an account in a few clicks or log in to continue.
Newagemugen

We're The Best At What We Do - Runnin' The Mugen Underground Since 2010. Underground M.U.G.E.N community specializing in advanced Quality Mugen content, Fanart, Graphics, Fighting Games & more.

You are not connected. Please login or register

Complete Stage Creation Tutorial By Cybaster

Go down  Message [Page 1 of 1]

G

G

Complete Stage Creation Tutorial By Cybaster OjtZ7W5
★★Thousand Dragon★★
Posted over 1000 Messages
★★Dark Master Of Fists★★
Newagemugen Member for over 10 Years
The Greatest Showman (Platinum)
Created 40 or more Unique Topics
★★Pot Of Prosperity★★
Commissioned/Donated to support Newagemugen
卍♆★Divine Overseer★♆卍
Verified Senior Forum support/assistant/curator
Lord Of War (Gold)
Obtained The Highest Tier 3 Warlord Class Rank
Fanservice (Bronze)
Recieved 20 or more likes from other Members

JUST TO LET EVERYONE KNOW, WE DIDN'T CREATE THIS TUTORIAL, IT WAS MADE BY CYBASTER. ALL CREDIT FOR THIS TUTORIAL GOES TO HIM.


Hi everyone, with this tutorial, I'll try to teach various aspects of stage making. I tend to often see the same mistakes in stages (bad symmetry, colorloss, etc.), or people not knowing how to do things as simple as making an animation or making a sprite transparent. This is what motivated me to write this tutorial.

DISCLAIMER : this tutorial is very long, but don't be scared. There are many screenshots and explanations, even on very basic stuff, so that everybody can get a hand on it, even those who have never created a palette for a sprite or those who have never opened Fighter Factory in their life. It's an interactive tutorial, where you create a stage on your own while following the various steps. Once you reach the end of the tutorial, you should be able to grasp most of the concepts of stage creation and start being creative on your own.

This tutorial is "open-source", post it wherever you want, translate it if you want, use parts of it in your explanations, etc. Some credit would be nice if you use it, but I don't really care, as this was mainly written to help out newcomers and people who have problems creating "good" stages. :)


Here is a list of the various tools you will need during this tutorial.
- Notepad (or Notepad++) : just a text editor to write your code. Alternatively, you can use the text editor in Fighter Factory.
- Fighter Factory (aka FF) : it will allow you to build the SFF. If you can, don't use the FF Ultimate version, as it is not made for stages. Use the old FF. Here is a link to make your life easier : LINK.
- The Gimp (or Photoshop, or Paintshop Pro) : the program to do all the graphical stuff. Use the one you're most used to. The Gimp has the advantage of being free, and can be downloaded at this address : http://www.gimp.org/

This tutorial is composed of several chapters :
1. Applying a palette to a sprite
2. Let's analyze a template
3. Let's create a basic stage
3.1 - Setting the floor
3.2 - Setting the sky
3.3 - Setting the bounds
4. Adding depth - Deltas
5. Animating the stage
5.1 - Adding a moving mushroom - Velocity
5.2 - Adding clouds - Transparency
5.3 - Adding Princess Peach - Creating Animations
5.4 - Adding Sinusoidal Movement - The Grand Finale
6. Common Mistakes to avoid
7. Additional Stuff
7.1 - Avoiding colorloss
7.2 - Other Animation Codes
7.3 - Foreground Images - The BlackJack Method
7.4 - BG Controllers
7.5 - Misc. Stuff - Parallax

During this tutorial, we will build a simplified version of my "Mario in the Sky" stage, using several images. Download these images, they are the ones we are going to use to create the stage. I'd advice you to follow the various steps while reading the tutorial, to see if you succeed in doing everything I've written.
Download the images here : THE LINK TO IMAGES

As you can see when opening the archive, most of the graphical work was already done.
- mario000 : the ground.
- mario001 : the sky.
- mario002 : background elements.
- mario003 to mario005 : various clouds.
- mario006 to mario009 : Princess Peach on a cloud.
- mario010 and mario011 : Flying Mario.
- mario012 : a mushroom.
- mario013 and mario014 : two sets of mountains.

The sprites are cropped (doh!) but don't have any palette. Applying a palette is the first thing we are going to do.


Last edited by GLB on Sun Oct 14, 2012 12:05 am; edited 2 times in total

https://www.newagemugen.com/

G

G

Complete Stage Creation Tutorial By Cybaster OjtZ7W5
★★Thousand Dragon★★
Posted over 1000 Messages
★★Dark Master Of Fists★★
Newagemugen Member for over 10 Years
The Greatest Showman (Platinum)
Created 40 or more Unique Topics
★★Pot Of Prosperity★★
Commissioned/Donated to support Newagemugen
卍♆★Divine Overseer★♆卍
Verified Senior Forum support/assistant/curator
Lord Of War (Gold)
Obtained The Highest Tier 3 Warlord Class Rank
Fanservice (Bronze)
Recieved 20 or more likes from other Members

1. Applying a palette to a sprite

Whether you rip your sprites from fighting games or other games, or whether you gather images from various sources on the Internet such as Deviantart, you'll get images in jpeg, bmp, gif or png format. Most of the time, these images will be in RGB Color format.

You must know that Mugen doesn't accept images of this type to go in the SFF (the file containing all the images of your stage). Mugen only accepts images in PCX format, with indexed colors. You should NOT include any other kind of image, or it will result in a black screen once in Mugen, or other strange effects. The old Fighter Factory allowed images in BMP format : DO NOT USE THIS OPTION ! This option doesn't work very well, and will ruin your work. Do things correctly, it's the aim of this tutorial anyway. :P

We will proceed in applying a palette to each image, one after the other. There are ways to batch process this if you need to apply the same palette to many sprites for example, but I won't explain this here, as there are very few images. For future reference about batch processing, read these topics :
http://mugenguild.com/forumx/index.php?topic=85562.0
http://mugenguild.com/forumx/index.php?topic=67668.0

I will explain the process using Photoshop. The process is the same for The Gimp and almost the same for Paintshop Pro. This process is the one I use and I find it to be reliable. There are other methods, using PCXClean for example, and you'll learn to develop yours with time or as you read other topics.

- Open the image mario006.png with Photoshop.
- The image is in RGB format, we have to convert it to indexed colors and apply a palette to it. Click on Image -> Mode -> Indexed Colors...
Complete Stage Creation Tutorial By Cybaster Image1
- It will open a window. Now, click on the Palette scroll, and click on "Exact". Alternatively, if the image has too many colours (more than 256), click on "Local (Perceptual)". Then, click "OK". Note that if your image has too many colors, it will be subject to what we call colorloss, and will result in something ugly. There are ways to avoid this, and we will abord this in the chapter "Avoiding colorloss".
Complete Stage Creation Tutorial By Cybaster Image2
- The image is now in indexed colors, but with a bad palette. Let's open the palette. Click on Image -> Mode -> Color Table.
Complete Stage Creation Tutorial By Cybaster Image3
- You should now see your palette like this :
Complete Stage Creation Tutorial By Cybaster Image4
- Notice that the pink surrounding the image is supposed to be transparent in-game. The "transparency color" is set by the palette. In Photoshop and the Gimp, the transparent color is the last one of the palette, while in Paintshop Pro it's the first one. We now have to place this pink color at the last position. Here is how I proceed : click on the pink square corresponding to the transparent color.
Complete Stage Creation Tutorial By Cybaster Image5
- A "color picker" window appeared. At the bottom of this window, you can see the color reference of the pink square : ff00da. Copy this number with Ctrl+C, then press on the "Cancel" button. Now, press the last square of the palette (where my mouse is on the next screenshot), and you'll get something like this :
Complete Stage Creation Tutorial By Cybaster Image6
- Now, press Ctrl+V in the color reference zone in order to copy the pink reference, and press "OK". You should now have a palette like this one :
Complete Stage Creation Tutorial By Cybaster Image7
- However, we are not done yet. There are two occurences of the same color in the palette. Click on the other pink square to open the color picker window. Replace the pink color by another one which you are sure doesn't appear in the image. In this example, I chose a bright green, as shown in the screenshot :
Complete Stage Creation Tutorial By Cybaster Image8
- Now, click "OK". To return to the Color Table. The palette is done, but we will not apply it to the image. Click on "Save...", as pointed with my mouse.
Complete Stage Creation Tutorial By Cybaster Image9
- Choose a name and a directory for your palette (which has a .act extension) and click on "Save" :
Complete Stage Creation Tutorial By Cybaster Image10
- Back on the Color table, click "Cancel" (VERY IMPORTANT !). You will see the image return to its older palette if you had the Preview option checked. Now, convert the image back to RGB Colors : Image -> Mode -> RGB Color :
Complete Stage Creation Tutorial By Cybaster Image11
- We will then apply the palette we have just created. Convert the image back to indexed colors (Image -> Mode -> Indexed Color), but don't choose "Exact" this time, but choose "Custom" :
Complete Stage Creation Tutorial By Cybaster Image12
- Once on the Color Table, click on "Load" :
Complete Stage Creation Tutorial By Cybaster Image13
- Obviously, you have to browse to find the palette you've just created, "Peach.act" in our case. Select it, and press "Load".
Complete Stage Creation Tutorial By Cybaster Image14
- You can now see the palette in the Color Table window. Press "OK". Then, in the Indexed Color window, press "OK" again. The palette is applied to the image, we just have to save it.
- To do that, press File -> Save as...
Complete Stage Creation Tutorial By Cybaster Image15
- Choose a different name if you want, but most importantly, save the sprite in PCX format, the only one accepted by Mugen. Scroll on the PCX option, click on it, then press "Save".
Complete Stage Creation Tutorial By Cybaster Image16
- You may now want to check if your sprite has been correctly palettized (no doubt about it if you've followed this tutorial correctly :P). Close the sprite and open it with Photoshop. Then, "Click on Image -> Mode -> Color Table...". The pink color should be in the last one of the palette. Click on the eyedropper tool in the down right corner of the color table :
Complete Stage Creation Tutorial By Cybaster Image17
- Then, click on the last color of the palette with your mouse, and the pink background should become transparent. This proves that everything was done correctly, as the last color of the palette is the one defining background transparency. Click on "Cancel", you don't want to save this :
Complete Stage Creation Tutorial By Cybaster Image18

CONGRATULATIONS !!! You have succeeded in applying to your sprite a palette which is compatible with Mugen.

Of course, you now have to repeat this process for each image. Once you are at ease with this method, each sprite can be palettized in 30 seconds.
I advice you to repeat the process to train and be sure you've understood all the steps. For those who already know how to do that, or for the lazy asses in the class, here is a file containing all the images palettized, and in PCX format : THE LINK TO IMAGES IN PCX FORMAT


Last edited by GLB on Sat Nov 03, 2012 1:01 am; edited 4 times in total


________________________________________________________________________________________________________________________________________________________________________

Complete Stage Creation Tutorial By Cybaster XqZWtLC
https://www.newagemugen.com/

G

G

Complete Stage Creation Tutorial By Cybaster OjtZ7W5
★★Thousand Dragon★★
Posted over 1000 Messages
★★Dark Master Of Fists★★
Newagemugen Member for over 10 Years
The Greatest Showman (Platinum)
Created 40 or more Unique Topics
★★Pot Of Prosperity★★
Commissioned/Donated to support Newagemugen
卍♆★Divine Overseer★♆卍
Verified Senior Forum support/assistant/curator
Lord Of War (Gold)
Obtained The Highest Tier 3 Warlord Class Rank
Fanservice (Bronze)
Recieved 20 or more likes from other Members

2. Let's analyze a template

Almost nobody codes a stage from scratch. Most people use a template and change values to make their own stage. Obviously, we're going to do the same. To this mean, we will take the training stage, available in your Winmugen folder when you first downloaded it. Quite a simple stage, with many explanations about the various parameters. For those who are too lazy to find it, you can download this stage HERE. I have also included a "cleaned" version where I removed most comments, because I hate it when my code (for a simple stage) is cluttered with comments about stage making, but that's just me. :P

Let's start by analyzing the various parameters of the DEF file and explaining the most important ones. While the SFF file contains the graphics, the DEF file contains all the code for the stage. You can open it with Notepad for example. I'll include here many advices on what makes a good stage, and the mistakes you shouldn't make. Some of the lines I'll comment here are not in the template, you can add them yourself if you want.

[mcode]
[Info]
name = "Training Room"
author = "Elecbyte"
[/mcode]
- Name and author are the two only Info parameters which should be included, both using quotation marks "".
- Adding other parameters such as palettes or VersionDate just proves that you copied a character's Def file and that you have no idea of what you're doing.
- If you want to include other infos such as credits, I'd advice you to write it just before the [Info] line, using ";" to make it as a comment.

[mcode]
[Camera]
startx = 0
starty = 0
boundleft = -95
boundright = 95
boundhigh = -25
boundlow = 0
verticalfollow = .2
floortension = 0
tension = 50
[/mcode]
Quite a lot of information here. Read carefully all the explanations and advices :
- startx and starty are the position of the camera at the beginning of the round. You should keep them to 0, it's easier to build symmetry like that.
- boundleft and boundright are respectively the left and right bounds of the stage. You should always have their absolute value being the same value. In short, you should ALWAYS have boundright = -boundleft. If you don't, your stage will not be symmetric, which means that a player will have an advantage over the other at the beginning of the fight, since one of them can be cornered more easily. This effect is less important on very wide stages, but a stage should always be symmetric, for the sake of clean coding and showing you know what you're doing.
- boundhigh is the top bound, it define up to which point the camera will go. This is a value you have to check by going to the top of the stage in Mugen. I'll explain later how to take care of this value.
- boundlow should be left at 0.
- verticalfollow is a parameter which goes from 0 to 1. It defines how much the camera will follow a player each time he jumps. Its value depends of the behavior you want to give to your stage. If you'd rather have a MVC styled stage with the camera following the characters very quickly, set the value to something like 0.8. If you don't want the camera to follow the characters a lot, set it to 0.3.
- floortension defines how high a character must jump in order for the camera to follow him. I personally hate it when the camera moves each time a character jumps a little, so I always set it to a high value, something around 90. If you like the camera to move though, set it to 20.
- tension should be left at 50. It's the horizontal distance a character must be from the edge before camera starts moving.

[mcode]
[PlayerInfo]
;--- Player 1 ---
p1startx = -70
p1starty = 0
p1startz = 0
p1facing = 1

;--- Player 2 ---
p2startx = 70
p2starty = 0
p2startz = 0
p2facing = -1

;--- Common ---
leftbound = -1000
rightbound = 1000
topbound = 0
botbound = 0
[/mcode]
All these values are generally the same in all the stages.
- leftbound and rightbound should NOT be lowered. If you want to make a really long stage, you need to increase these values or you can run into character problems (fireballs getting stuck in the corner, cornerpushes getting fucked up and leading to infinites, etc.)
- Some authors modify p1startx and p2startx value, so that it looks better at the beginning of the fight. Do not do that ! Some characters rely on distances to trigger special intros between them. If you change these values, the intro will be fucked up.

[mcode]
[Scaling]
topz = 0
botz = 50
topscale = 1
botscale = 1.2
[/mcode]
For the love of God, Buddah or whoever you like, don't change these values !!! By modifying them, you can scale the size of the characters in the stage. While this looks like a neat effect, it's in fact destroyed by the fact that hitsparks and other effects are not scaled in the process, which results in something ugly more than anything else.

[mcode]
[Bound]
screenleft = 15
screenright = 15
[/mcode]
It's the distance from the left/right edge of the screen that characters can move to. The usual value is 15, but Capcom games usually have a value of 24 for example. You should use a higher value if you don't want the characters to go near the borders of the stage, because there are walls for example. You should never use the leftbound and rightbound values (in [PlayerInfo]) to achieve this kind of effect.

[mcode]
[StageInfo]
zoffset = 190
autoturn = 1
resetBG = 1
Hires = 0
[/mcode]
- zoffset is the position where the players stand at, it defines the ground level. Its value is usually around 220. You have to play with this value to place your characters correctly on the ground. Avoid setting too low, or the characters will be hidden by powerbars at the bottom of the screen. If put too high, the characters will clutter the screen and you won't see them when they jump.
- Don't touch autoturn, it makes the characters face each other.
- resetBG should be set to 1 if you want the stage to reset all its anims at the beginning of each round. However, if you have a sort of "story" going on, with animations depending on time, you should set it to 0.
- Hires is a new optional line introduced in Winmugen Plus. It allows to differenciate low-res and high-res stages. Set it to 1 if your stage is high-res. You can ommit this parameter if your stage is low-res.

[mcode]
[Shadow]
intensity = 96
color = 0,0,0
yscale = .3
fade.range = 0,0
[/mcode]
- intensity is the shadow's darkening intensity. Its range goes from 0 for invisible shadow to 256 for dark shadow. Make sure the brightness of the shadow matches that of the other elements in the stage.
- color is the color given to the shadow for red, green and blue channels. Value goes from 0 to 256 each time. For example, if you want a sort of red shadow, you set the value to 256,0,0.
- yscale defines the length of the shadow. The bigger the value, the longer the shadow. Alternatively, you can use negative values if you want the shadows to go "into" the screen.
- fade.range defines the range to make the shadow visible when a character is jumping. If a character jumps very high for a long time, and you can still see his shadow in the sky, it would just look silly, this parameters defines how to make the shadow fade out. Read the DEF file for more information.

I'd advice you to play with the values a little bit, to see how they affect the stage, since we won't be using them for the Mario stage (sorry).
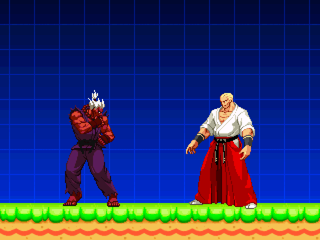
- The 1st image shows you how the shadows look like with the initial values.
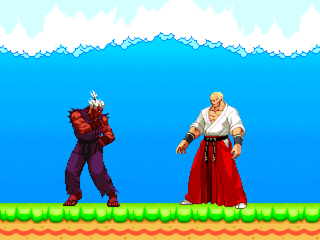
- The 2nd image has an intensity of 200 and longer shadows due to an yscale of 0.5.
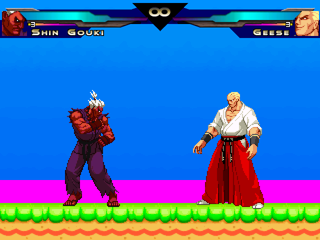
- The 3rd image has a light intensity of 50, making the shadows bright. The yscale was set at -0.2, which results in short shadows going "into" the screen. Finally, I didn't set the fade.rage parameter, so if a character jumps very high, the shadow doesn't fade.
Complete Stage Creation Tutorial By Cybaster Image1
Complete Stage Creation Tutorial By Cybaster Image2
Complete Stage Creation Tutorial By Cybaster Image3

[mcode]
[Reflection]
intensity = 0
[/mcode]
- Leave this value to 0 if you don't want any reflection.
- Reflection should be used only on stages where the floor can logically reflect the players : some clean marble, water, etc. Don't use it because it makes the stage flashier, it's ridiculous.
- Don't use shadow AND reflection in the same stage, it looks bad and not natural. If the floor reflects the players, there won't be any shadows. In fact, the temple stage by Elecbyte is a good example of what you should avoid in terms of shadow+reflection. :P
- In short, if the intensity of the reflection is not 0, the shadow's one should be 0, and vice-versa.

[mcode]
[Music]
bgmusic =
bgvolume = 0
[/mcode]
- bgmusic defines the path to the music. Don't put a simple "sound/" without adding any music in it, or Mugen will crash. Either put a music, or don't write anything at all.
- bgvolume is the volume of the music. Value goes up to 255, no need to use 45678, as I've seen sometimes.

[mcode]
[BGdef]
spr = stage0.sff
debugbg = 0
[/mcode]
- spr sets the path to find the sprites (the SFF file). Usually, the DEF and SFF file should be in the same place, so you can just use "stage0.sff". If they're not in the same path, you'll have to use something like "stages/lowres/stage0.def", depending on where you placed it.
- debugbg allows you to easily debug your stage and find graphical glitches, as magenta will appear at places where there are no sprites. When creating a stage, always set this value to 1. Set it back to 0 when you have finished creating/debugging the stage.

We have finished analyzing all the parameters for the stage. Now, the rest of the code consists in defining the graphics, the axes, animations, etc. This is the subject of the next part.


Last edited by GLB on Sat Nov 03, 2012 1:03 am; edited 1 time in total


________________________________________________________________________________________________________________________________________________________________________

Complete Stage Creation Tutorial By Cybaster XqZWtLC
https://www.newagemugen.com/

G

G

Complete Stage Creation Tutorial By Cybaster OjtZ7W5
★★Thousand Dragon★★
Posted over 1000 Messages
★★Dark Master Of Fists★★
Newagemugen Member for over 10 Years
The Greatest Showman (Platinum)
Created 40 or more Unique Topics
★★Pot Of Prosperity★★
Commissioned/Donated to support Newagemugen
卍♆★Divine Overseer★♆卍
Verified Senior Forum support/assistant/curator
Lord Of War (Gold)
Obtained The Highest Tier 3 Warlord Class Rank
Fanservice (Bronze)
Recieved 20 or more likes from other Members

3. Let's create a basic stage


In this chapter, we are going to start modifying stage0 in order to obtain a basic layout of our future Mario stage. I will explain the basic steps to insert sprites in the SFF file using Fighter Factory, and the basic code in the DEF file to generate BG stuff and display a one or two layer(s) stage, what most beginners do the first time they create a stage.

- Start by installing stage0 in your Mugen (full or clean version, as you wish. Note that I will quote only the clean version later on), if it has not been done already.
- Open the DEF file with Notepad, and set debugbg to 1. Save the file.
- Launch Fighter Factory, and open the SFF file of the stage by clicking on "Sprites -> Open" :
Complete Stage Creation Tutorial By Cybaster Image1
- Browse to the correct path, and load the SFF :
Complete Stage Creation Tutorial By Cybaster Image2
- You can now see that the sprites are launched. I will now explain various buttons you can see in Fighter Factory, in order for you to add or remove sprites, align them, etc.

Here are the most important buttons we'll be using during the stage creation process. There are many other buttons, which you'll have to discover yourself, by playing with them.
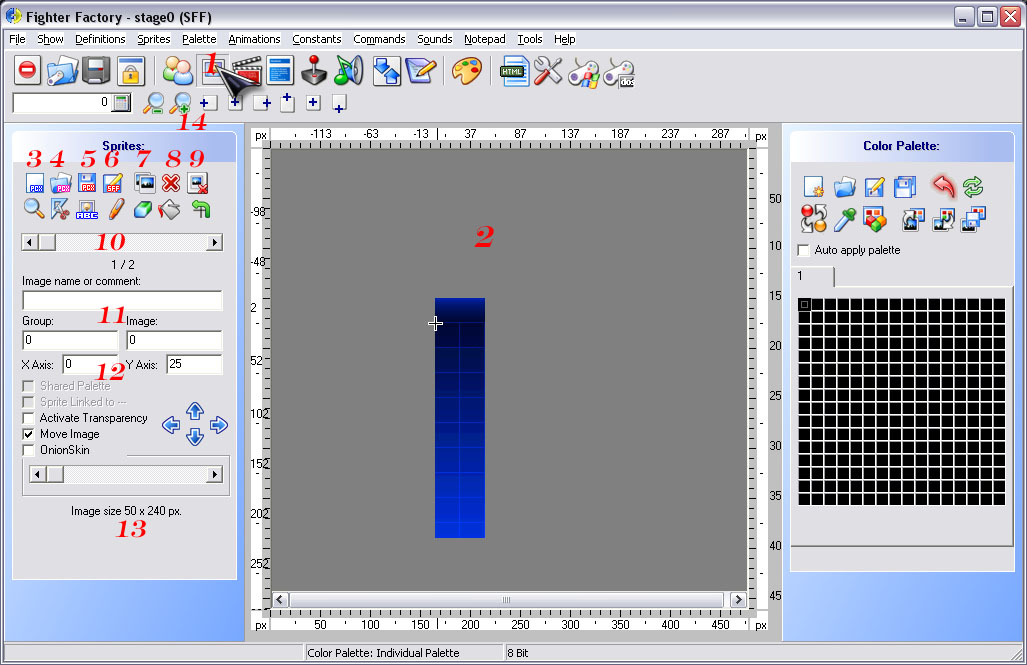
Complete Stage Creation Tutorial By Cybaster Image3
1. The button defining which file you're working on. The sprites in our case. Other buttons concern AIR file, SND, DEF, CNS, etc. We won't take care of them.
2. The zone in which you can see your sprites. The cross in the middle defines the 0,0 axis (the origin). You can move the cross in the zone for better visibility, and you can interactively move sprites around the cross to change the axes of a sprite.
3. This button allows you to add sprites to the SFF, it adds the sprite just after the sprite you are on.
4. This button allows you to change the sprite you're currently on by another sprite of your choice.
5. Press this button to save your progress in a new file. You can use it to make backups.
6. Press this button to save your progress.
7. This button allows you to duplicate sprites. We won't be using it here. It's mainly for characters.
8. and 9. These buttons allow you to delete a sprite or a group of sprites.
10. This bar allows you to browse through all the sprites, you can see under it your position and the number of sprites in the SFF.
11. These blocks define the Group and Image parameters of the current image. You can use whatever group and number you want, but be careful to never have two (or more) sprites having the same group and same number. The convention is to put all sprites of the same type in a single group, and number them from 0 to the number of sprites. For example, mario006 to mario009 are sprites of Peach. We could place them at Group number 3, and number them from 0 to 3. During the tutorial, when I write "sprite 123,45", it means that it's the sprite which is placed in group 123, with the number 45.
12. These blocks define the X-axis and Y-axis of the current sprite. You can see their position in zone 2, compared to the central cross.
13. You can see the size of the image here. It comes handy when you have to do some calculations for alignment.
14. These magnifying glasses allow you to zoom in and out of zone 2, in order to get a better view of the sprites.

We will now start modifying the stage's SFF and DEF file to build our own stage.

3.1 - Setting the floor

- Go on the second sprite of the SFF (sprite 0,1), and press the "Change" button (button 4 on the screenshot).
Complete Stage Creation Tutorial By Cybaster Image4
- Browse to find sprite mario000.pcx, which is the floor of our stage, and click on "Open".
Complete Stage Creation Tutorial By Cybaster Image5
- You now see that the sprite was exchanged, and that our floor is the sprite 0,1, with axis=0,0. I personally prefer aligning my sprites in the SFF rather than in the DEF file, at least concerning the X axis. At the bottom left of FF, you can see the size of the sprite : 768x37 pixels. What I want to do is center the sprite on the cross X-wise, so that I will just have to use an axis of 0 in the DEF file later on. The calculation is very simple, we just have to divide the width of the sprite by 2 to get the center : 768/2 = 384. We just have to change the X-axis of the sprite to 384 and we will have centered it. You can either move it with the mouse in zone 2, or just write down the correct axis in the right box. By doing so, you won't see the sprite move in zone 2. Don't worry, it's just a little glitch. Go to sprite 0,0 with the bar, and go back to sprite 0,1. You can see your sprite is well placed now :
Complete Stage Creation Tutorial By Cybaster Image6
- Press the save button (button 6 on the screenshot) and launch Mugen to see how it looks like now :
Complete Stage Creation Tutorial By Cybaster Image7
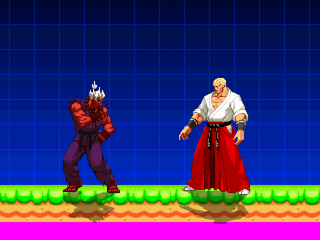
- As you can see, there are several problems. There is magenta at the bottom of the screen (from DebugBG), so we will have to align the floor Y-wise. The characters are not standing perfectly on the ground either. We will have to change this value too, once the floor is aligned. Therefore, it's time to open the DEF file to start recoding some things.

For now, we will act on the floor's sprite. Search for this piece of code in the stage :
[mcode]
[BG 1]
type = normal
spriteno = 0, 1
start = 0, 185
delta = 1, 1
mask = 0
velocity = 0, 0
tile = 1, 0
tilespacing = 0, 0
[/mcode]
Let's analyze the code a little bit.
- type = normal is the usual parameter. We'll get back to this later.
- spriteno is the sprite number : group and number. 0,1 corresponds to our floor.
- start defines the position of the sprite at the beginning of the fight. The first value (0 in our case) is the X-axis, second value (185 here) is the Y-axis.
- delta allows you to create depth in the stage, by making the elements move one between the others, as some elements our closer to the fight while other are very far. For the floor, the delta should ALWAYS be 1,1 for low-res stages, and 2,2 for high-res stages. If you fail to comply with this, the characters will appear to slide on the floor, which is not suitable at all. The further the element is in the background, the lower its delta must be, in order for it to look natural and realistic.
- Velocity is what allows you to make the element move, tile and tilespacing allow you to tile your sprite. I will come back on these parameters later. For now, just change the tile to 0,0 :
[mcode]
tile = 0, 0
[/mcode]

- We now have to align the floor Y-wise. To do this, just change the second value of the start parameter until you find something that suits you. After several tries, it turns out the best value is Y=203. If it's lower than 203, you will see pink, if it's higher than 203, part of the sprite will be lost out of the screen. Hence, I just changed the code to :
[mcode]
start = 0, 203
[/mcode]
- However, even though the floor is well placed, the characters are now floating in the air :
Complete Stage Creation Tutorial By Cybaster Image8
- As said in chapter 2, the value relative to the position of the players on the ground is the zoffset parameter in the [StageInfo] part of the DEF file. Change the value until you find something that suits you. I personally set it to (open the spoiler if you want to see my value) ...
Spoiler:
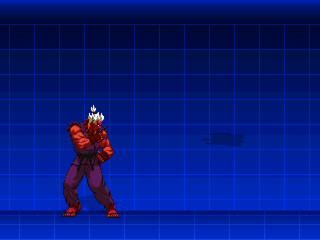
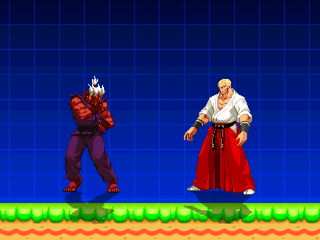
- I also set the shadow intensity to 0, as this stage won't have any shadows. We obtain something like this :
Complete Stage Creation Tutorial By Cybaster Image9

3.2 - Setting the sky

We will now follow the same process to change the background of the training stage into the sky. I won't explain everything again, just refer to what you did on the floor sprite :
- In FF, go on sprite 0,0.
- Press the "Change" button.
- Browse to mario001.pcx (the sky sprite) and click on "Open".
- The sprite has its axis at 0,25. We will once again center it X-wise. The sprite's width being 768 pixels once again, the center is 384. Just for convenience, I used 0 for the Y axis. If everything was done correctly, you should have something like this in FF :
Complete Stage Creation Tutorial By Cybaster Image10
- Save your SFF file and launch Mugen, and you'll see something like this :
Complete Stage Creation Tutorial By Cybaster Image11
While it looks okay and proves everything is correct for now, it's not quite what we want. You can see that the top of the screen corresponds to Y axis = 0. We are going to change the sky's Y axis in order to get a full portion of it.

Open the DEF file once again and search for the code relative to the sky, which means sprite 0,0 :
[mcode]
[BG 0]
type = normal
spriteno = 0, 0
layerno = 0
start = 0, 0
delta = 1, 1
trans = none
mask = 0
tile = 1, 0
tilespacing = 0,0
window = 0,0, 319, 239
[/mcode]
- Start by cleaning the code of the unnecessary stuff (I'll come back to it later) : remove trans, tile, tilespacing and window lines.
- We are now going to change the Y axis of the sky sprite. Try random values and look at what it does. Note that the Y axis is going from top to bottom, so if you want the sprite to go up, you have to input negative values. For example, if I set it to -220 like this : "start = 0, -220", it will result in something like this :
Complete Stage Creation Tutorial By Cybaster Image12
- As you can see, I put the sky too high, so there's a zone which doesn't contain any pixels, hence it appears in magenta due to debugbg. The value I set it too is -190. With this value, some portion of the sky is hidden by the floor, but I think it's high enough anyway.

IMPORTANT : As you may have noticed, the code relative to the sky is placed before the code relative to the floor. It was done on purpose. Mugen parses code from the top to the bottom of the file, so the first sprites to be displayed are those written at the beginning of the file, and the last ones to be displayed are those at the end of the code. To resume : arrange your code -> further elements are at the beginning of the file, close elements are at the end.

3.3 - Setting the bounds

Now you're asking "Damn, I have a huge floor and very wide sky, but my stage is small, how's that ?!" This is what we are going to correct now, which means setting correctly the bounds : the left, the right and the heigth one. We will set the left/right bounds, before setting boundhigh.

- In the DEF file, go in the [Camera] part of the code, and change the values of boundleft and boundright to high values (but always keeping their absolute value the same). In this example, I set them to +/- 300.
- Then, after saving, launch Mugen and go to one corner (the one you want) of the stage. As you can see, the stage is much wider, or rather, too wide :
Complete Stage Creation Tutorial By Cybaster Image13
- That's why it's important to always check the corners, as it's easy to miss a one pixel wide vertical line, especially if you didn't set debugbg to 1. Of course, I overdid it in the example, but it was just to make a point. Set the boundleft and boundright values to a value you feel is okay for the width of the stage. I used +/- 220.

Now we are going to set the boundhigh parameter following a similar process. However, usual characters can't go very high in the sky to allow you to check boundhigh. There are two ways of testing it, use the one you prefer :
1) Activate Debug mode by pressing Ctrl+D ingame. Jump with a character and quickly press Ctrl+I when the character is in the air. He will then stand in the air. Repeat the process as much as you need until the character reaches the top of the stage.
2) Choose one character of your choice which will always be your test character (it's better if you use this method only in a Test Mugen). Open the CNS file of the character, and look for the [Movement] section at the beginning of the file. Set the number of air jumps you can perform to a very high number, as such :
[mcode]
[Movement]
airjump.num = 999 ;Number of air jumps allowed (opt)
[/mcode]
You character can now jump like crazy, allowing you to reach very high portions of stages.

Once you have chosen the method you prefer, set the boundhigh to a high value, and repeat the same process as for boundleft and boundright. For example, setting the boundhigh to -220 will lead you to something like this :
Complete Stage Creation Tutorial By Cybaster Image14
- After some tests, I set the boundhigh value to -185. Finally, we have a [camera] section with these values :
[mcode]
boundleft = -220
boundright = 220
boundhigh = -185
[/mcode]

With all the work accomplished till now, we have a very basic functionnal stage. It has a floor and a background. All the bounds are set correctly, the camera doesn't move all over the place when characters jump, etc.
In fact, we've already gone further than most beginners. If you want, you can start creating basic one layer stages with this process, that's what many beginners do anyway. :P

To finish this part, let's just change the name of the stage and add an author name, because it's not a "Training Stage" anymore. I called it "Mario Tutorial - Basic Stage" and added my name as author. Of course, you call it as you wish.

You can download the file of this stage (what was done until now) here : http://network.mugenguild.com/cybaster/stage_tutorial/stage_part_ 3.rar


Last edited by GLB on Sat Nov 03, 2012 1:09 am; edited 4 times in total


________________________________________________________________________________________________________________________________________________________________________

Complete Stage Creation Tutorial By Cybaster XqZWtLC
https://www.newagemugen.com/

G

G

Complete Stage Creation Tutorial By Cybaster OjtZ7W5
★★Thousand Dragon★★
Posted over 1000 Messages
★★Dark Master Of Fists★★
Newagemugen Member for over 10 Years
The Greatest Showman (Platinum)
Created 40 or more Unique Topics
★★Pot Of Prosperity★★
Commissioned/Donated to support Newagemugen
卍♆★Divine Overseer★♆卍
Verified Senior Forum support/assistant/curator
Lord Of War (Gold)
Obtained The Highest Tier 3 Warlord Class Rank
Fanservice (Bronze)
Recieved 20 or more likes from other Members

4. Adding depth - Deltas


Needless to say, the stage might be functional, but it lacks more elements. That's what we are going to add now, with different deltas, in order to add depth to the stage.

First of all, we are going to start organizing our work. Until now, with two images, there was no confusion possible in the DEF file, but as you add more and more stuff, in random order, it becomes convenient to label your work. I personally name all my BG stuff with comments. In the stage we currently have, I changed :
- [BG 0] to [BG sky]
- [BG 1] to [BG Floor]
It helps organizing your stuff easily. Only rule you have to respect is that it needs the word "BG" in brackets. Then, add the name or comment you want.

We will first add the mario002.pcx sprite, the one with a lot of fancy Mario related stuff on it. Let's start by inserting the sprite in the SFF.
- In FF, go on the last sprite of the SFF (sprite 0,1) and click on the "Add" button.
Complete Stage Creation Tutorial By Cybaster Image1
- You should see a new window called "Add image" appear. Browse to the mario002.pcx sprite. Don't add it yet, we have to set some values first. Set the number of the sprite to 2, since sprite 0,2 is not used yet, and it's a static background element, justifying group 0. You can leave the X axis to 384, since the sprite is 384 pixels wide too (yeah, life is easy with you). Don't check "Shared Palette" nor "Auto Crop". Your screen should look like this :
Complete Stage Creation Tutorial By Cybaster Image2
- Click on "OK". FF will tell you one sprite was added. Then, it will tell you that the sprite may have not been added correctly, since no palette is applied to the SFF. This is not a problem whatsoever for a stage.

We will now add the piece of code relative to this background element.
- Open the DEF file, and copy paste the code relative to the sky. Paste it between the sky and the floor code, and name it [BG Big Mushrooms, Plants, etc.] or however you want.
- You have to set the various values to match your sprite, as such :
[mcode]
[BG Big Mushrooms, Plants, etc.]
type = normal
spriteno = 0, 2
layerno = 0
start = 0, 47
delta = 0.9, 1
[/mcode]
- spriteno = 0,2 corresponds to the sprite in the SFF.
- the start value (Y-wise) can be found by testing random values, or with some calculation : 47 = 240 - 156 - 37. I'll let you figure out this one.
- The delta allows the sprite to move a bit X-wise, compared to the floor and the sky. I kept the Y-delta at 1 because I don't want it to go "through" the ground when a character jumps.

However, if we launch the stage in Mugen, we get this horrible thing :
Complete Stage Creation Tutorial By Cybaster Image3
This comes from the fact that I didn't tell Mugen to consider the last colour of the palette as the transparent one. This is done by adding the code
[mcode]
mask = 1
[/mcode]
Each time you use a sprite with transparency involved, you should add the code "mask = 1". You should use "mask = 0" (or ommit to write the code) only if the sprite is square and doesn't involve transparency, as the 2 precedent sprites we added, or when you're using the jiggsaw technique and want your 256 colors to be displayed correctly (cf. chapter "Avoiding colorloss")

This line being added, we now have a correct display :
Complete Stage Creation Tutorial By Cybaster Image4

The next part step will be easy, since we are just going to repeat the same process to add more mountains in the background. Hence, we are going to add mario013.pcx and mario014.pcx to our stage.
- I won't be explaining the process at all on this one. You have a white card to produce whatever you want, and you can place the mountains how you wish.
- THE ONLY RULE TO REMEMBER : the further the element, the nearest to the beginning of the code it must be. And the further the element, the smaller the X delta must be.
- I inserted both sprites using group 1.
- I placed mario014 behind mario013. Smalest mountains and lighter colors indicate further background mountains IMO. Both mountain sprites are obviously placed behind the [BG Big Mushrooms, Plants, etc.] stuff.
- I placed the mario013 mountains twice in the stage. Obviously, they were only inserted once in the SFF, but the code was doubled in the DEF file, with only the position changing.
- If you want to see the code I have written, just open the spoiler. However, I'd advice you to try to code it yourself first. You have all the explanations and knowledge to do so. It's just about reproducing what you have just done with the [BG Big Mushrooms, Plants, etc.] sprite :
Spoiler:
- Here are two screenshots of what I have with my code :
Complete Stage Creation Tutorial By Cybaster Image5 Complete Stage Creation Tutorial By Cybaster Image6

We now have a very cool stage, with deltas giving depth to it. At this point, what differenciates a good stage from a bad/average one is the originality you put in the stage, and how you mix various elements. It's often a bad idea to mix different sprite styles (be it for a character or a stage).

I changed the name of the stage to "Mario Tutorial - Depth Added", just for this tutorial. You can download the current progress of the stage here : Stage with Depth.


Last edited by GLB on Sat Nov 03, 2012 1:12 am; edited 2 times in total


________________________________________________________________________________________________________________________________________________________________________

Complete Stage Creation Tutorial By Cybaster XqZWtLC
https://www.newagemugen.com/

G

G

Complete Stage Creation Tutorial By Cybaster OjtZ7W5
★★Thousand Dragon★★
Posted over 1000 Messages
★★Dark Master Of Fists★★
Newagemugen Member for over 10 Years
The Greatest Showman (Platinum)
Created 40 or more Unique Topics
★★Pot Of Prosperity★★
Commissioned/Donated to support Newagemugen
卍♆★Divine Overseer★♆卍
Verified Senior Forum support/assistant/curator
Lord Of War (Gold)
Obtained The Highest Tier 3 Warlord Class Rank
Fanservice (Bronze)
Recieved 20 or more likes from other Members

5. Animating the stage

Okay, so the stage is nice and all, but how about we add some animated elements, which will be moving all around the stage and give an impression of life to the stage. We will start simple by adding a moving sprite, then we will focus on creating animations and applying more complicated effects.

5.1 - Adding a moving mushroom - Velocity

As said, we're going to start simple. You can see that mario012.pcx is a little mushroom. We will add him to the floor, just behind the characters, and make it move horizontally.

- Start by adding mario012.pcx to the SFF file and save. I added it as sprite 2,0, with axis = 0,0.
- Now, open the DEF file and add the mushroom so that it's placed perfectly on the ground. Place him wherever you want on the X axis, it doesn't matter so much.
- At this point, you shouldn't have to look at my code, but just in case :
Spoiler:
- When done, you should obtain something like this, with a static mushroom on the ground :
Complete Stage Creation Tutorial By Cybaster Image1

We are now going to make the mushroom move horizontally with some simple velocity. If you look at the code for the floor BG, you should see these lines :
[mcode]
velocity = 0, 0
tile = 0, 0
tilespacing = 0, 0
[/mcode]
Setting these values to zero makes the element static and appear only once, which is what we wanted for the floor. Copy paste these 3 lines to the mushroom BG.

Let's analyze these 3 lines of code, and understand what they're meant for :
- velocity is what allows you to make a sprite or animation move. The first value is the X velocity, the second one is the Y velocity. If you want to make an element move diagonally, you'll have to set both values to something different from zero. In our case, we will only change the X velocity.
- tile can be whatever integer value. If set to 0, the sprite won't repeat itself throughout the stage. If set to 1, it will have infinite tiling on the axis you have set it to 1. The first value is the X tiling, the second one is the Y tiling. In our case, we will only tile it on the X axis. If you don't use tiling, the animation will just be displayed once with velocity on the stage, and never appear again. That is not what we want in our case. When tile is set to anything over 1, it will cease to be infinite. Tile = 2,0 will show the stage item in the original location, and will place one more time, horizontally in this case. Hence, tile = 2,0 is showing the item two times. You can use tile this way to place something on the screen a limited number of times.
- tilespacing sets the space between the tiles. If you want to create a motif for example, you wouldn't put any spacing. However, in the case of our moving mushroom, we wouldn't want 10 mushrooms on the screen at the same time, and we don't want the mushroom to appear too often too. We will have to find/guess a good value to achieve this.

You should now start playing with these values, and try making the moving mushroom acceptable. Here is the code I have written for it, feel free to use whatever suits you :
[mcode]
velocity = 2, 0
tile = 1, 0
tilespacing = 1500, 0
[/mcode]
- There's velocity only on the X axis. Value was made positive to make the mushroom move from left to right. You can make it negative if you wish to have it move from right to left.
- Tiling was done only for the X axis, with a tilespacing of 1500, which ensures it won't appear too often.
- I set the X start value to -270 too, so that it's not on the screen at the beginning of the fight, but appears a few moments after the fight starts.

5.2 - Adding clouds - Transparency

We will now be adding moving clouds in the sky. You won't learn many new things concerning animation. The goal of this part will be to :
- Train by adding several clouds at various speeds and heights. Some will pass in front of the mountains, some behind.
- Add some transparency to a sprite.

Once again, I won't be holding your hand, as you should have enough experience to add sprites in the SFF and code the clouds on your own.
- I added mario003.pcx, mario004.pcx and mario005.pcx in the SFF in group 3, number 0, 1 and 2, all with axis = 0,0.
- I added the medium sized one twice. It passes in front and behind the mountains. Big one passes in front of the mountains, small one behind. As said, you have white card to do the effect you want to, place the clouds at a height that suits you, etc. I made them move from right to left.
- Here is the code I use, if you want to look at it :
Spoiler:
- Here's an image of what I get after writing this code :
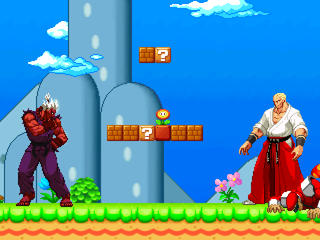
Complete Stage Creation Tutorial By Cybaster Image2

We are now gong to make the clouds a little transparent, as real clouds. Note that I usually wouldn't make clouds of this type transparent, as it doesn't necessarily match with the sprite style, but the goal of this tutorial being to show you a maximum of stuff, this is the best way I found to introduce transparency.

There are two ways of applying transparency. One of them is by defining it in the sprites when creating an animation, which is a process we will see later on. We will now focus on applying transparency in the BG code itself, while introducing you to various types of transparency.
- Add the line "trans = " to the code of a cloud passing in front of a mountain.
- You can set the "trans" parameter with different values.
+ "none" for normal drawing. It's the usual behaviour and the default one if you omit this parameter (as it was done from the beginning of this tutorial).
+ "add" for color addition (like a spotlight effect).
+ "add1" for color addition with background dimmed to 50% brightness.
+ "sub" for color subtraction (like a shadow effect).
+ "addalpha" for colors with additive transparency (alpha must be specified).
Best is to test this parameter on your clouds sprite, and see for yourself what effect you get. In order, you have the cloud with "add", "add1" and finally "sub".
Complete Stage Creation Tutorial By Cybaster Image3 Complete Stage Creation Tutorial By Cybaster Image4 Complete Stage Creation Tutorial By Cybaster Image5
- As you can see, the "sub" effect is definitely not the one we are looking for, while both "add" and "add1" give very few transparency to the sprite.
- Let's now use "addalpha", and add a "alpha = " line in the code.
- The code for alpha is : "alpha = int, int", the first number being the source, while the second is the destination. Both values go from 0 to 256.
- Test values for alpha. Here are some examples :
+ First image is with alpha=256,128. Sprite is much brighter and a little bit transparent.
+ Second image is with alpha=128,128. Sprite has the same brightness, but with the transparency appears darker.
+ Third image is with alpha=128,256. Sprite has the same brightness, but appears more transparent.
Complete Stage Creation Tutorial By Cybaster Image6 Complete Stage Creation Tutorial By Cybaster Image7 Complete Stage Creation Tutorial By Cybaster Image8
- After some tests, I added these lines too all the cloud related code :
[mcode]
trans = addalpha
alpha = 200,255
[/mcode]
- Here's an image of what I get with this code. In my opinion, it has enough transparency while not being too bright :
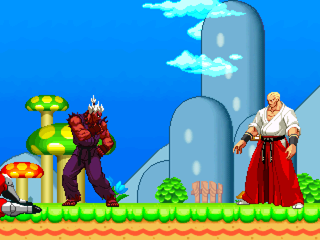
Complete Stage Creation Tutorial By Cybaster Image9

5.3 - Adding Princess Peach - Creating Animations

Until now, the elements we've added to make the stage more lively are just single sprites which we moved with the velocity controller. In this chapter, we are going to learn how to create an animation and display it on the stage.

- Let's start by adding the various Peach sprites in the SFF. They are the sprites mario006.pcx to mario009.pcx.
- While we could be adding them one after the other, as you used to do, it will be more convenient to add them all at the same time.
- Press the "Add" button, as usual, but instead of selecting one sprite to add, select all of Peach's sprites by maintaining Ctrl and clicking on the 4 sprites. Set the group to 4, and make sure the number is set to "0,1,2,3,4..." (look at where my mouse points) :
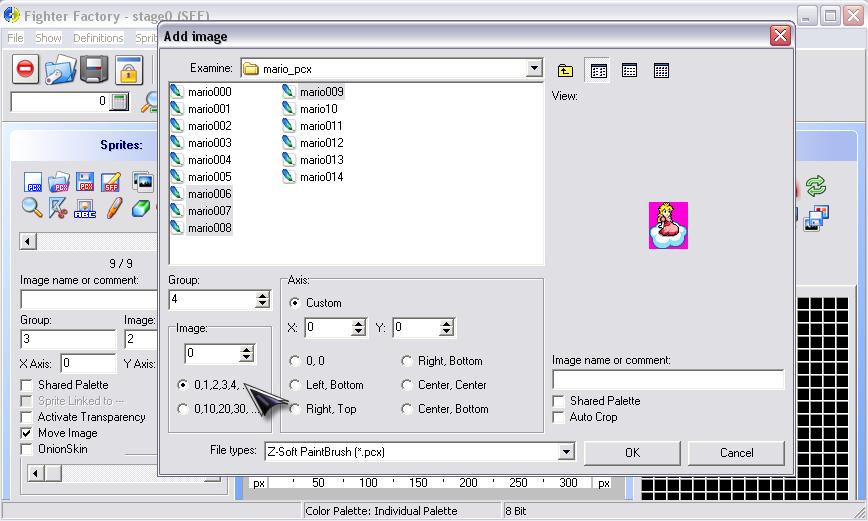
Complete Stage Creation Tutorial By Cybaster Image10
- Once this is done, press "OK". You've just added 4 sprites to the SFF, which is handy when you need to add dozens of sprites, depending on the stage you're creating.
- Luckily, your sprites are aligned. If you look at all the sprites, you'll see the sprites don't move all over the place each time. If it happens in your future creations with sprites of a same animation, align them by hand in the SFF, it's much easier than doing it by code, and much cleaner.
- Save your SFF file. We're now going to code the animation.

The code for using animations is almost the same as the one we've used before. Here is the "minimal" code for it to work correctly :
[mcode]
[BG Princess Peach]
type = anim
actionno = 1
start = 0,20
[/mcode]
- You can see the "type" is not "normal" anymore, but "anim".
- Instead of defining which sprite to use for this BG Controller, you define which animation you're going to display, with "actionno". Here, Princess Peach will be defined in animation number 1.
- You may have noticed there is no "mask=1" line. As a matter of fact, using an animation automatically sets the transparency for the sprites.

Obviously, we now have to write the code for animation number 1. Here is how to write it :
[mcode]
[Begin Action 1] ;Peach on cloud
4,0,0,0,120
4,1,0,0,10
4,0,0,0,100
4,2,0,0,70
4,3,0,0,15
4,2,0,0,50
[/mcode]
- To define an animation, you have to write in brackets [Begin Action XXX], with XXX being the number of your animation.
- The structure of each line is as follow : "group, number, X axis, Y axis, time". There are other optional parameters, which we'll see later. Let's focus on the basics for now.
- "X axis" and "Y axis" are way to modify the position of a sprite if you need to. They can help create animations by displaying sprites at various positions.
- "time" is the number of ticks the sprite is displayed before displaying the next one. There are 60 ticks per second.
- Mugen reads the code from top to bottom, and automatically loops the animation when it reaches the end of it. Hence, the animation will display in order sprites : 0 1 0 2 3 2 0 1 0 2 3 2 ...
- The odd tick numbers and order of the sprites was just to make the animation do things in the good order. You can see Peach looking elsewhere, then looking at you before winking, etc.

Write down this code at the end of the DEF file, and save before launching Mugen :
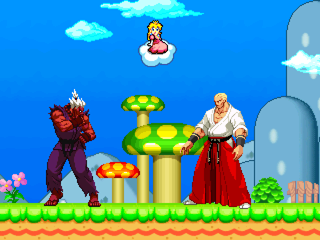
Complete Stage Creation Tutorial By Cybaster Image11
- You can now appreciate how the animation looks like, and if it suits you or not. Peach is obviously static in the air. You can apply some velocity to her to make her move (don't forget the tiling). In the next part, we will add some code to make the movement nicer.

IMPORTANT NOTE : The tilespacing parameter works differently for "normal" and "anim" elements. --;
- With "normal" elements (non-animated) when tilespacing = 0, 0, tiling will occur as one would expect where the element is duplicated with no spaces in between the images. A 100 x 100 image tiled once in the x direction will result in a total of 200 x 100 pixels of space covered.
- With animated elements, when tilespacing = 0, 0, tiling will not occur the same way but instead the tile will be created at the same coordinates as the original image. A 100 x 100 animation tiled once in the x direction will cover 100 x 100 pixels. To achieve a similar effect for normal elements, tilespacing should be the actual width of the image; in this case : tilespacing = 100, 0.

5.4 - Adding Sinusoidal Movement - The Grand Finale

We have nearly finished creating the stage !!! Congratulations if you've followed every step up to this point. ;) In this short chapter, we will just add some sinusoidal movement to Peach, and you will be able to train by writing the animation and code for Flying Mario.

First of all, here is the code I used to make Peach move :
Spoiler:

With this code, Peach slowly moves from right to left on the screen, appearing every few seconds. However, the movement doesn't look very natural in my opinion, and doesn't give an impression of her floating in the air with her cloud. To this mean, we are going to apply some sinusoidal movement on Peach, by affecting the way she moves Y-wise (not X-wise).
To do this, I added this code :
[mcode]
sin.y = 7.5,96,0
[/mcode]
- The 3 parameters are, in order of appearance, the magnitude, the time and the phase.
- "Magnitude" is the number of pixels it will go up and down (or left and right if you use sin.x).
- "time" is the number of ticks necessary to accomplish one cycle.
- "phase" should be used if you have several sinusoidal movements you want to differenciate a little. Learn some Maths to know what it is exactly.

You now have all the elements to do the final part of the tutorial : adding Mario sprites (mario010.pcx and mario011.pcx) and coding the animation and motion for him.
- Just one thing to be careful with : his sprites won't be aligned if you insert them both with "axis = 0,0".
- The rest of the coding is merely the same as Peach's one. You have to create an animation using another animation number. It would be nicer to make Mario move from left to right, etc.

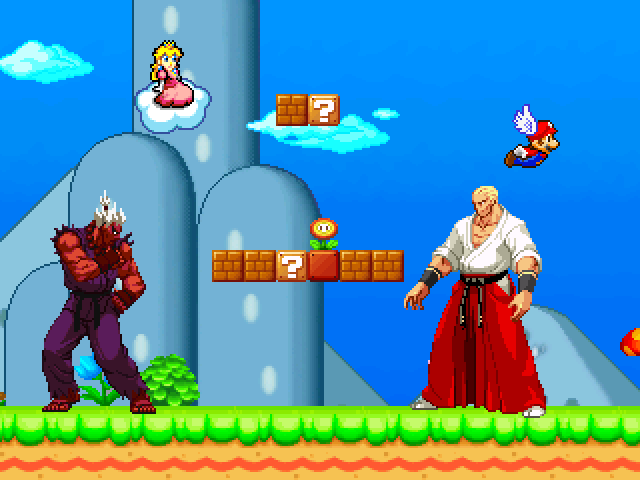
Here is how the stage looks like after adding all the images included in the first file you've downloaded :
Complete Stage Creation Tutorial By Cybaster Image12

Congratulations, you have finished this tutorial !!! \o/ You now have all the necessary knowledge to create almost anything. Your only barrier now is your imagination. Of course, knowing how to code a stage doesn't mean you'll create "good" stages, since you need to compose your stages carefully, especially with custom ones, but you have all the tools to make a good job now. :)

Here is a link to the final stage, in case you want to look at Mario code for example (U SUX :P) : Final Stage


Last edited by GLB on Sat Nov 03, 2012 1:14 am; edited 2 times in total


________________________________________________________________________________________________________________________________________________________________________

Complete Stage Creation Tutorial By Cybaster XqZWtLC
https://www.newagemugen.com/

G

G

Complete Stage Creation Tutorial By Cybaster OjtZ7W5
★★Thousand Dragon★★
Posted over 1000 Messages
★★Dark Master Of Fists★★
Newagemugen Member for over 10 Years
The Greatest Showman (Platinum)
Created 40 or more Unique Topics
★★Pot Of Prosperity★★
Commissioned/Donated to support Newagemugen
卍♆★Divine Overseer★♆卍
Verified Senior Forum support/assistant/curator
Lord Of War (Gold)
Obtained The Highest Tier 3 Warlord Class Rank
Fanservice (Bronze)
Recieved 20 or more likes from other Members

6. Common Mistakes to avoid

This chapter is just a list of common mistakes I see when people release stages, and which should be avoided. If you have followed the tutorial, you already know about them, but this list may be handy if you're in a hurry and just want to know what you should ALWAYS look out for when creating a stage.

- Debugbg : Always set it to 1 when you create a stage, to avoid missing graphical glitches. Set it back to 0 when you have finished creating the stage.

- Floor Delta : The delta for the floor should always be 1,1 for a low-res stage, and 2,2 for a high-res one. If you don't set the delta to these values, characters will slide on the ground, which is ugly.

- Symmetry : The most common mistake. Make sure your stage is symmetric, meaning that boundleft = -boundright. Otherwise, a character will have an advantage over the other.

- Height of the stage : Always check your boundhigh value using one of the two methods to go to the top of the screen.

- Correct deltas : The further the element, the lower the delta. Don't forget this, or you'll get some funky behaviour with your background elements.
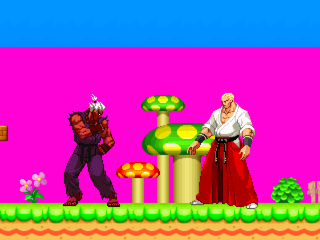
- Floortension : The way people set this value is debatable. I personally hate it when the camera glitches or moves a lot each time a character jumps. That's why I always set floortension to a high value (about 90) while setting verticalfollow to 0.2 to allow the camera to follow MVC type jumps.
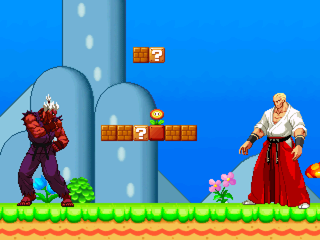
- Cropping the sprites : You didn't have to do this during the tutorial, since the sprites were already cropped. Anyway, when you have finished creating your stage, crop all the sprites using the "crop all" button in Fighter Factory. Don't forget to make a backup of your SFF before doing so, because FF can be buggy at times. Alternatively, you can use the SFFExtract + SprMaker method.

- Framerate : Mugen should turn at 60 frames per second (fps), always ! When you test your stage, and if it has a lot of effects or sprites, turn debug mode on with Ctrl+D, and look at the framerate at the bottom left of the screen. If it's not around 60 fps, you have to work on your code, number of layers, cropped sprites, etc. because that means your stage is slowing down Mugen, which is not good for gameplay.


________________________________________________________________________________________________________________________________________________________________________

Complete Stage Creation Tutorial By Cybaster XqZWtLC
https://www.newagemugen.com/

G

G

Complete Stage Creation Tutorial By Cybaster OjtZ7W5
★★Thousand Dragon★★
Posted over 1000 Messages
★★Dark Master Of Fists★★
Newagemugen Member for over 10 Years
The Greatest Showman (Platinum)
Created 40 or more Unique Topics
★★Pot Of Prosperity★★
Commissioned/Donated to support Newagemugen
卍♆★Divine Overseer★♆卍
Verified Senior Forum support/assistant/curator
Lord Of War (Gold)
Obtained The Highest Tier 3 Warlord Class Rank
Fanservice (Bronze)
Recieved 20 or more likes from other Members

7. Additional Stuff

7.1 - Avoiding colorloss

Sometimes, you want to use an image which has (much) more than 256 colors. Hence, when you convert it to indexed colors, the quality of the image goes down proportionally to the number of colors it had at the beginning. There are 3 methods to avoid colorloss.

Jiggsaw Method :
It consist in cutting the original image in many little pieces, then display all the pieces at the correct place in the stage. Each small piece having less colors than the original image, you lose less colors when you convert it to indexed colors. The optimal size for the tiles using this method is 16x16 pixels, since 16^2=256, hence a tile will contain 256 colors maximum, and you're sure to avoid colorloss. However, cutting an image into tiles of this size is insane and results in too many tiles. Using 25x25 or even 50x50 tiles if the image doesn't have too many gradients is often enough.

Here is a quote by XGargoyle about handling the Jiggsaw method with Photoshop :
"- Your psd file contains all the tiles arranged correctly, but each tile is a different layer
- Export each layer as a different 8-bit indexed pcx. Use photoshop's excellent tools such as batch automation, actions and scripts
- Each resulting pcx will have the same size (i.e. 800x1200) and they will consist on a tile placed somewhere and the rest is just the magenta background
- Now create the text file for sffmaker. Placing the axis is easy because you don't have to do any calculation at all. All the sprites will have the same axis
- Finally build the SFF and make sure the crop option is enabled in the command line (so your sprites are optimized and reduce filesize)"

RGB Method :
It's the most common method nowadays, even though it has its flaws. It consists in separating the image into its 3 channels : red, green and blue (RGB), with a graphical software. Then, in Mugen, you can reconstitute the image by placing the images one over the other with transparency.
While this method ensure no colorloss and is very quick to use, it results in a white screen when characters use alpha ctrls.

For more information about this method, reffer to this topic by Jango : The RGB Method.

ImageSplitter :

A method using a tool developed by AokManiac13, after [E] told him about the algorithm.
To get the tool, go here : http://randomselect.piiym.net/ -> Download Tools -> General Purpose Tools -> ImageSplitter.

Using this command-line tool, you will get many uncropped layers, which you will just have to insert in the SFF, all with the same axes. Then, you just have to write the code for one layer and do some copy-pasting job to display the others.

The only problem with this method is that it may generate a high number of layers (something like 50), and Mugen may not be able to handle that properly without having your framerate go down drastically.


7.2 - Other Animation Codes

While we have learned how to code simple animations, there are other parameters you can add to achieve different kind of effects. Here's a short list of these parameters.

- Infinite time :

You may want an animation to stop on a particular sprite and display it indefinitely, until the end of the fight. To do this, you just have to set the time (number of ticks) of the sprite to -1, as such :
[mcode]
[Begin Action 123]
123,0,0,0,4
123,1,0,0,4
123,2,0,0,4
123,3,0,0,4
123,4,0,0,-1
[/mcode]
Sprite 123,4 will be displayed for an infinite time.

- Turning the sprites :

If you have sprites you need to turn horizontally or vertically, you don't have to include them several times in the SFF after having modified them with Photoshop. You can do this simple rotation effect in the definition of your animation. Using "H" at the end of the line will turn the sprite horizontally, and using "V" will turn it vertically. You can use "HV" to do both :
[mcode]
[Begin Action WTF Flip]
10,2,0,0,5 ;Normal sprite
10,2,0,0,5,H ;Sprite with horizontal symmetry
10,2,0,0,5,V ;Sprite with vertical symmetry
10,2,0,0,5,HV ;Sprite with horizontal and vertical symmetry.
[/mcode]

- Adding transparency :

We previously used the "trans" parameter in normal sprites to make the clouds transparent. However, when defining an animation, you may want to define the transparency within the animation itself. This is done by adding some other code at the end of the line :
[mcode]
[Begin Action WTF Trans]
10,2,0,0,5 ;Normal sprite
10,2,0,0,5,,A ;Additive transparency (identical to trans=add)
10,2,0,0,5,,A1 ;Additive transparency with background dimmed to 50% brightness (identical to trans=add1)
10,2,0,0,5,,S ;Substractive transparency (identical to trans=sub)
[/mcode]
notice the two ",,". These are made because the code between the commas is made to flip the sprites, as we have seen in the precedent paragraph.

If you're using WinMugen or Linux Mugen (but not DOS Mugen), you can also define the transparency better as if you were using "trans = AddAlpha". This is done by using ASxxxDyyy, with "xxx" being the source, and "yyy" the destination, both values being between 0 and 256. If you want to make an animation fade out, you would use a code like this :
[mcode]
[Begin Action 16];Fading Out
16,0, 0,0, 4,,A
...
16,13, 0,0, 4,,A
16,14, 0,0, 4,,A
16,15, 0,0, 4,,AS200D256
16,16, 0,0, 4,,AS160D256
16,17, 0,0, 4,,AS120D256
16,18, 0,0, 4,,AS80D256
16,19, 0,0, 4,,AS40D256
16,-1, 0,0, 40,,AS40D256
[/mcode]
The last line means that you're using and empty sprite.

- LoopStart :

This parameters allows you to define a point from which the animation will loop. An example being better than hundreds of explanations :
[mcode]
[begin Action 10]
10,0,0,0,5
10,1,0,0,5
10,2,0,0,5
10,3,0,0,5
10,4,0,0,5
LoopStart
10,5,0,0,5
10,6,0,0,5
10,7,0,0,5
10,8,0,0,5
10,9,0,0,5
[/mcode]
The LoopStart is defined for sprite 10,5, which means the animation will loop from there. Hence, the animation will display the sprites from group 10 in this order :
0 1 2 3 4 5 6 7 8 9 5 6 7 8 9 5 6 7 8 9 ...


7.3 - Foreground Images - The BlackJack Method

You may have noticed in the tutorial a line of code concerning the number of the layer :
[mcode]
layerno = 0
[/mcode]
This code was present in the sky or the moving mushroom for example.

Most sprites use this layer number of 0, which means that they appear behind the characters. However, you may sometimes want to include some elements in front of the characters. It may be a layers of snow as it can be an element on the ground closer to the screen than the characters. To do this, you just have to change the layerno to 1 :
[mcode]
layerno = 1
[/mcode]
Sprites with layerno=1 follow the same rules as the sprites with layerno=0, which means that they appear in the same order as the order you've coded them in the DEF file. Hence, you should be careful if you have several items with layerno=1. However, these sprites will always appear in front of sprites with layerno=0, whatever the place where you code them in the DEF file.

Using a foreground element of this type, you can achieve effects of this type :
Complete Stage Creation Tutorial By Cybaster Image1

However, while this effect can be neat, it may sometimes clutter the fight and make the fighters disappear behind a huge foreground element, which is not suitable. A simple solution to this is to make the foreground element transparent. However, if you limit yourself to this, the foreground element will appear entirely transparent, and background elements will be seen through it, which is not very nice.

The good method is called the BlackJack method (the name of the guy who found this method) : you just copy-paste the code for your foreground element. You set the first one to layerno=0, and you give to the one with layerno=1 some transparency. Your code should go from :
[mcode]
[BG foreground]
type = normal
spriteno = 10, 0
layerno = 1
start = 0,0
delta = 1,1
trans = none
mask = 1
[/mcode]
to this :
[mcode]
[BG foreground 1]
type = normal
spriteno = 10, 0
layerno = 0
start = 0,0
delta = 1,1
trans = none
mask = 1

[BG foreground 2 trans]
type = normal
spriteno = 10, 0
layerno = 1
start = 0,0
delta = 1,1
trans = add1
mask = 1
[/mcode]
I used "add1", but you can use "add" or "addalpha" if you want. By doing this, the same stage now looks like this :
Complete Stage Creation Tutorial By Cybaster Image2
The sprite will appear as normally as before, but will be transparent when a character passes behind it.

Nono used an alternative version of this code by using "add" and "sub" at the same time, you can check it by looking at this topic.


7.4 - BG Controllers

These are very powerful tools I won't be explaining here. You should report to the Mugen Docs for more information. Look at here, Part IV for more information about Background Controllers.

Tamez also wrote in-depth tutorials about Background Controllers, explaining Animation Change, VelSet and VelAdd, click here for the link to the tutorial videos.

However, as pointed out by Mike Werewolf in his French translation of the Mugen Docs, there's a mistake in the simple example given at the end of the file. Here's a corrected version, just for you :

-- Simple Example -

Suppose we want to make a person walk back and forth from (-300,0) to (300,0), right behind the main characters. We'll use background controllers to accomplish this task.
First, define the walking animations. Say that the character's walking sprites are 10,0 through 10,3 and that they face to the right.
[mcode]
; Walk right
[Begin Action 10]
10,0,0,0,6
10,1,0,0,6
10,2,0,0,6
10,3,0,0,6

; Walk left
[Begin Action 11]
10,0,0,0,6,H
10,1,0,0,6,H
10,2,0,0,6,H
10,3,0,0,6,H
[/mcode]

Now start the character off at the far left edge of his range.
[mcode]
[BGDef]
(...)

[BG Peregrinator]
type = anim
actionno = 10
id = 10
start = -300, 0
delta = 1,1
[/mcode]

Let's give Peregrinator a comfortable ambling speed of 2 pixels per tick. The one-way distance for his walk is 600 pixels, which will take 300 ticks. In total, it'll take him 600 ticks to make the round trip. Using this knowledge, set up the background controllers appropriately: since the entire situation repeats every 600 ticks, we can set the global looptime to 600.

[mcode]
[BGCtrlDef Peregrinator]
; reset the whole deal every 600 ticks.
looptime = 600
ctrlID = 10

; Set velocity of 2 pixels/sec rightward at time 0.
[BGCtrl Walk Right]
type = VelSet
time = 0
x = 2

; Set velocity of 2 pixels/sec leftward at time 300.
[BGCtrl Walk Left]
type = VelSet
time = 300
x = -2
[/mcode]

[i]NB from Mike Werewolf : Elecbyte forgot a part of the code. As it is now, the code makes the peregrinator go from left to right and vice-versa, but the anim always stays the same, with the peregrinator facing right. Hence, in the secind phase of the BGCtrl (walk to the left), the peregrinator will be doing a moonwalk. To correct this, we will add a BGCtrl to change the animation in the middle of the walk :[i]
[mcode]
[BGCtrl Turn to the Left]
type = Anim
time = 300
value = 11
[/mcode]

[i]However, following the same idea, with the previous code, the peregrinator will indeed use anim 11 from time=300, but when the BGCtrlDef womes back to the beginning of the loop, it didn't receive any other indication, hence it will continue using anim 11, and we will start getting the moonwalk at the second loop. We just have to add a new BGCtrl. The whole code for this part becomes this :[i]
[mcode]
[BGCtrlDef Peregrinator]
; reset the whole deal every 600 ticks.
looptime = 600
ctrlID = 10

; Set velocity of 2 pixels/sec rightward at time 0.
[BGCtrl Walk Right]
type = VelSet
time = 0
x = 2

[BGCtrl Turn to the Right]
type = Anim
time = 0
value = 10

; Set velocity of 2 pixels/sec leftward at time 300.
[BGCtrl Walk Left]
type = VelSet
time = 300
x = -2

[BGCtrl Turn to the Left]
type = Anim
time = 300
value = 11
[/mcode]

And that's it! You can make the walk look better by having Peregrinator slow down and display a turning animation at each end of his walk. This would entail use of the VelAdd and Anim controllers. If you want Peregrinator to stop and start at regular intervals as he goes from one end to the other, you could create more VelSet and Anim controllers with their own individual looptimes (to get the behavior to repeat at regular intervals).

Finally, there is another mistake in the Mugen Docs. They specify that the syntax is :
[mcode]
[BGCtrl]
type = Enabled
[/mcode]
However, having the "d" on the end will make mugen crash. It needs to be:
[mcode]
[BGCtrl]
type = Enable
[/mcode]


7.5 - Misc. Stuff - Parallax

This is an effect you can apply to the floor, to make it move as the characters move. If you do it correctly, it can achieve nice effects, but is horrible if done badly. You can't go by eye with this method, and will have to use some Maths to code it properly.

As I have never used this method, I will link you to two tutorials :
1 - VIB's method : http://www.geocities.com/vibhp/mugen/tuto/parallax.html New: http://mugenguild.com/forumx/index.php?topic=116138.0
2 - Winane's method: http://www.justnopoint.com/Dev/index28.php.htm (don't forget to read the last post)

Also, thanks to Dark Saviour for these videos :
Here are illustrations that might help you, check what happens under Vice's feet when the stage scrolls:
1 - A bad parallax: click here
2 - A good parallax: click here

If you need more informations about parallax, do a search in the forum with "parallax jackson" (yes, I'm serious), by user "Ziltama".


________________________________________________________________________________________________________________________________________________________________________

Complete Stage Creation Tutorial By Cybaster XqZWtLC
https://www.newagemugen.com/

Back to top  Message [Page 1 of 1]

Permissions in this forum:
You cannot reply to topics in this forum